You can create grade columns for activities, assignments, and assessments conducted outside Blackboard. For manually added items, no submissions exist. The column is populated when you assign the grades.
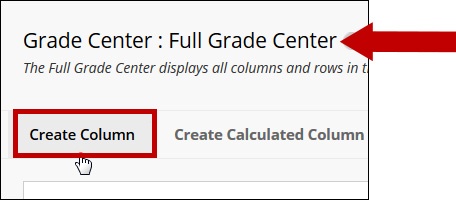
1. In the Course Management > Control Panel > click Grade Center and click on Full Grade Center.

2. Click on the Create Column button.

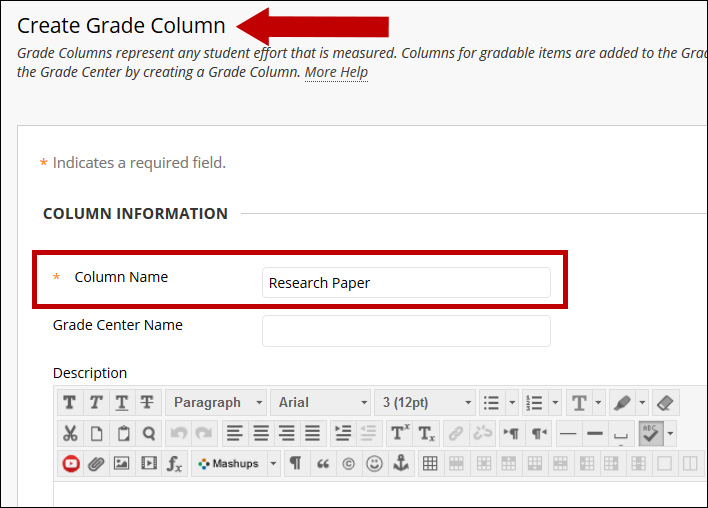
3. On the Create Grade Column page, type a brief name in the Column Name field. The name you typed will populate in the Grade Center Name field. Keep column names short and indicative of the activity they represent. The Description is not a required field.

4. Make a selection in the Primary Display menu. The selection is the grade format shown in the Grade Center and to students in My Grades.
Optionally, make a selection in the Secondary Display menu. The default setting is None. In the Grade Center column, the secondary value appears in parentheses. The secondary value doesn’t appear to students.
Also optionally, you can associate the column with a Category.

Note: There are five options available for the grade display:
Score: A numeric grade is the default setting. If you don’t make a selection, the score appears in the grid.
Letter: A letter grade appears. The default grading schema is used to assign letter grades. For example, a score of 21/30 equals 70% and appears as a C.
Text: Text appears in the column when you create and associate a text grading schema. Examples of text values include: Excellent, Very Good, Good, Fair, and Poor -OR- Satisfactory and Unsatisfactory. If no text grading schema exists, and you select the Text option, you can type text in the column’s cells. Limit your text to 32 characters. If you choose to share the column results with students in My Grades, they see the text values for their grades.
You can convert a numeric score to text. But, if you don’t create a custom text grading schema, and return to numeric scoring, values that can’t be converted display a zero after conversion. If you want to include text as grades, we recommend that you create a text grading schema and associate it with the appropriate columns.
Percentage: A percentage appears. For example, a score of 21/30 appears as 70%.
Complete/Incomplete: When a student submits an item, a Completed icon appears in the column regardless of the score achieved.
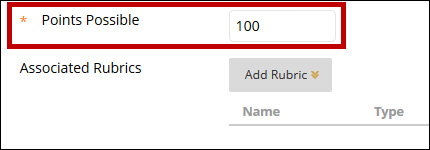
5. In the Points Possible box type the total points. Entries must be numeric. If you associate a rubric with the column, make sure the number of points for the column matches the total number of points of the rubric.

Note: If you assign zero points to the column, the percentage cannot be calculated and a letter grade cannot be displayed (because a letter grade is based on percentage). A score will be displayed in this case.
6. Optionally, provide a Due Date. Due dates appear on the course calendar.

7. Select the Options:

- Include this Column in Grade Center Calculations: Select Yes to make the column available for potential inclusion when creating calculated columns.
- Show this Column to Students: Select Yes to display the column to students in My Grades.
- Show Statistics (average and median) for this Column to Students in My Grades: Select Yes to include statistical information with the grade value when shown to students.
Note: In the grade center, Hide grade center columns from students is different from Hide grade center columns from instructors. Make sure you Hide columns from students before you hide columns from instructors.
8. Click Submit.

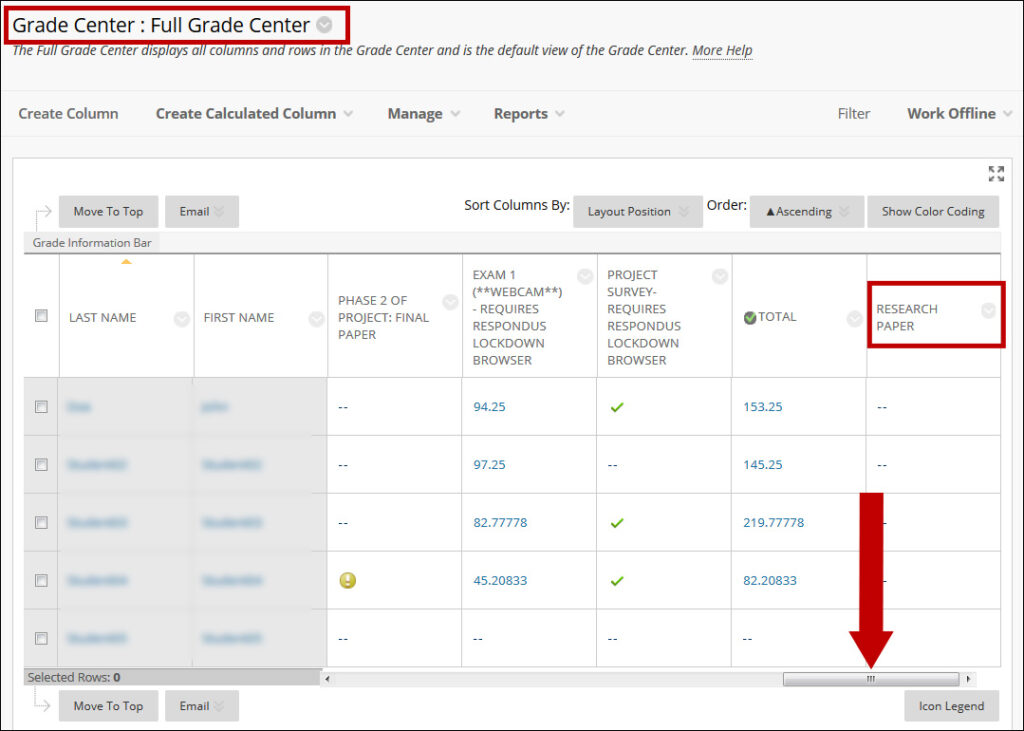
9. The grade center column will display at the far right of the grade center; you may need to scroll horizontally to get to the newly created column.

