1. Access the Collaborate Ultra tool within your Blackboard course.
2. Click the Create Session button. Please note that each course comes with a Course Room. However, if you need more, continue to follow the steps below.
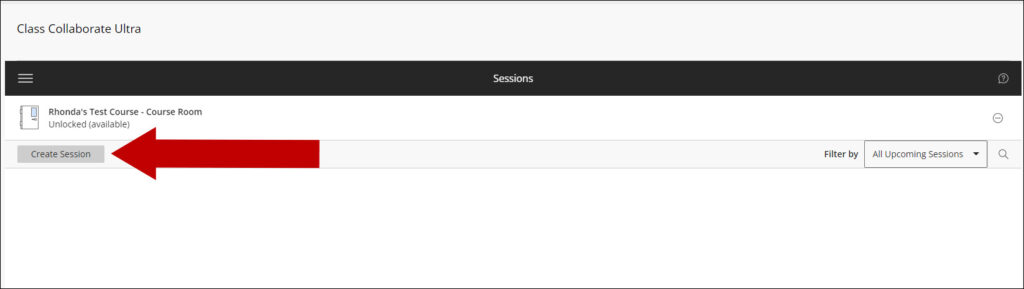
3. A panel will open on the far right-hand side of the screen, where you may begin to edit the session.
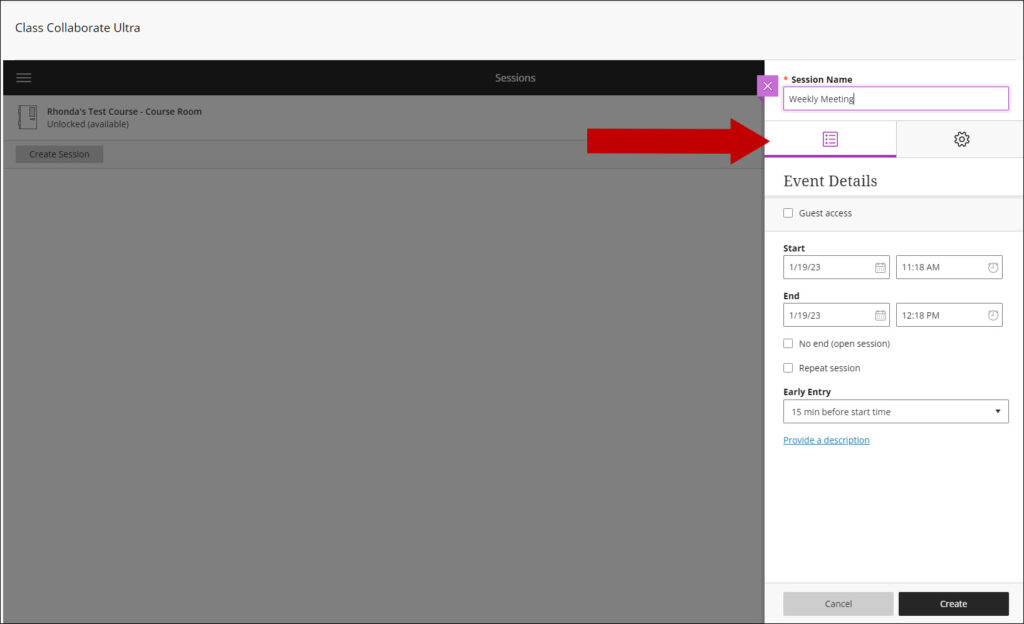
4. Notice that there are two tabs. Under the first tab, you will enter your event details, including your Session Name, Guest Access, Guest Role*, and the Date/Time, indicate whether it is an open or repeat session, enable early entry, and provide a session description. Under the second tab, you will select your session’s settings.
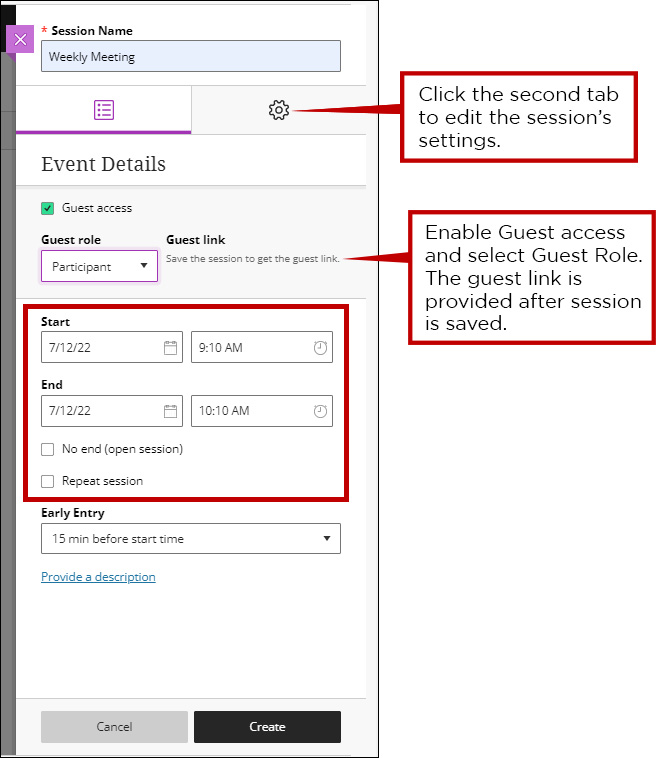
*Guest Roles: The role of the Participant allows users to access the session, chat, and raise/lower their hands if they have questions. Presenters have all the privileges as Participants but can also upload, share, edit, and share content. Additionally, they can see hand-raise notifications and can lower their hands. Moderators have full control over the session. They can change attendee roles, remove attendees from the session, and modify session settings. Note: Participant is the default attendee role in Collaborate Ultra.
5. Click the Session Settings tab to view and select your session setting options. Under Session Settings, click the drop-down menu under Default Attendee Role to select attendee roles, allow recording downloads and Anonymous chat messages, Moderator permissions, Participant permissions, Enable session telephony, Private Chat, Large scale session (250+), Profanity filter, and *Multimedia.
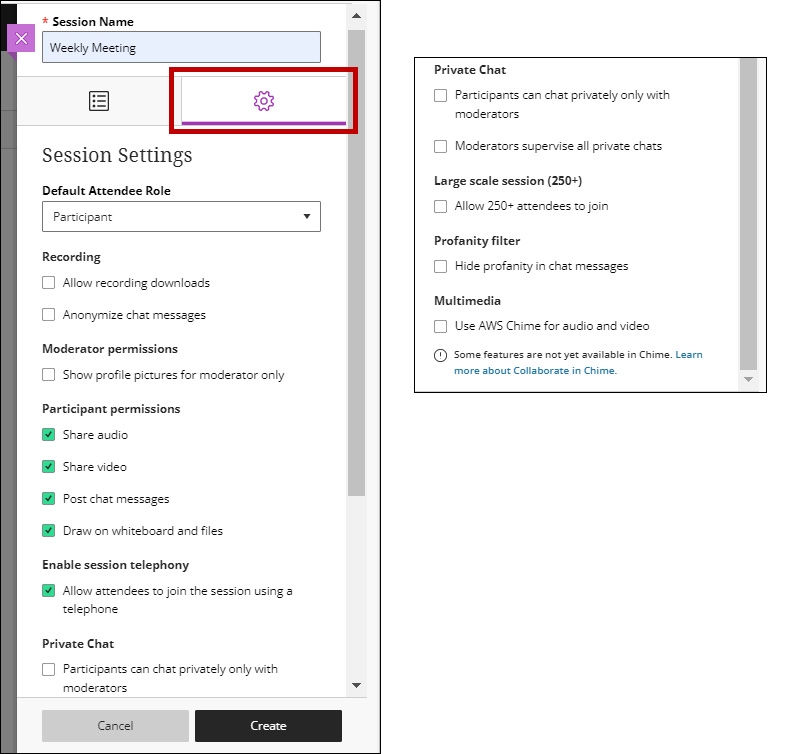
Note: The Multimedia AWS Chime feature is new to Collaborate Ultra and some of the features provided by this tool are still in development. For more information, please visit the Class Help Website.
6. When finished, click the Create button located at the bottom of the menu.

7. Once created, your session will appear on your Sessions menu.
