Blackboard’s Content Collection feature is a file repository that allows you to store, manage, and share your files. These files can be linked into courses and/or shared by the owner with other users on the system. Courses are allowed 1 GB of storage.
Note: Uploading large files like mp4 videos in your course content area (where students access course materials) consumes a considerable amount of course storage space. Instead, upload the file to a file-hosting site and link to the video in the course.
Access Content Collection
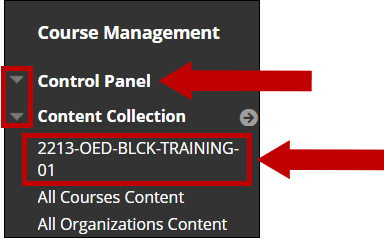
1. Go to the Course Management area in your course and select Control Panel. Click Content Collection. Select the Course ID.
You are now in the Course Content area and can view all files in your course. In this area, you can also add additional files, organize your content into folders, or delete items.
Check Course Storage Quota
View how much space you have available in your course. Courses are allowed 1 GB of storage.
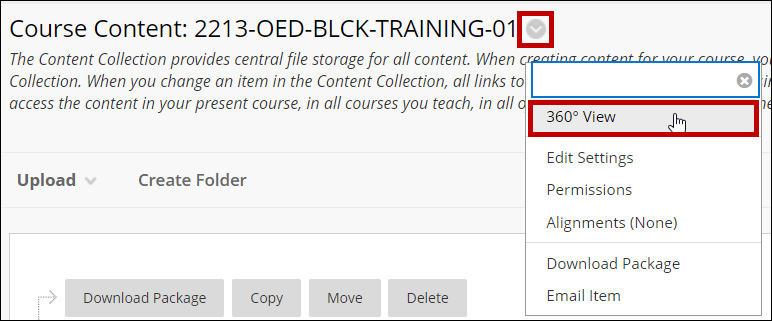
1. Access your Content Collection (see steps above). Click the chevron beside your course name and select 360o View.
2. You will now see your course folder Properties. Folder Size indicates the amount of course storage that has been used. Courses are allowed 1 GB of storage.
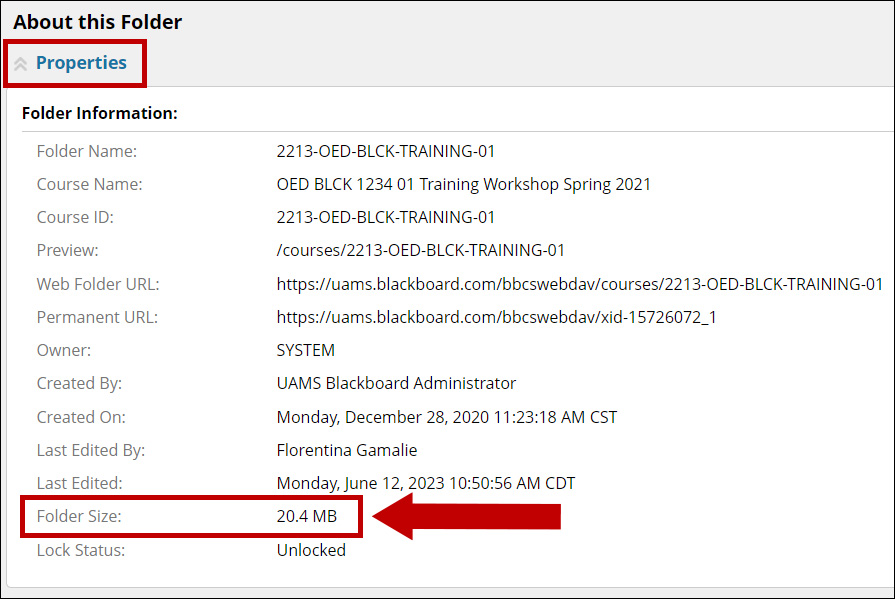
Note: If you exceed the storage limit you cannot upload files and you will receive a warning message.
Create Folder
Use folders to organize the course materials.
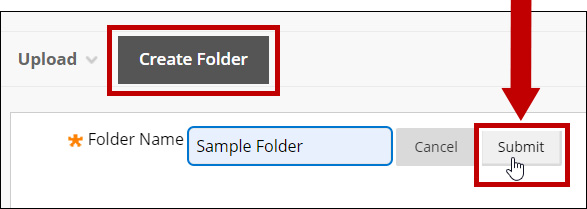
1. Click Create Folder. Enter a folder name and click Submit.
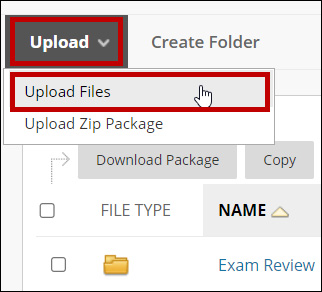
Upload Files
1. Click the Upload button then select Upload Files.
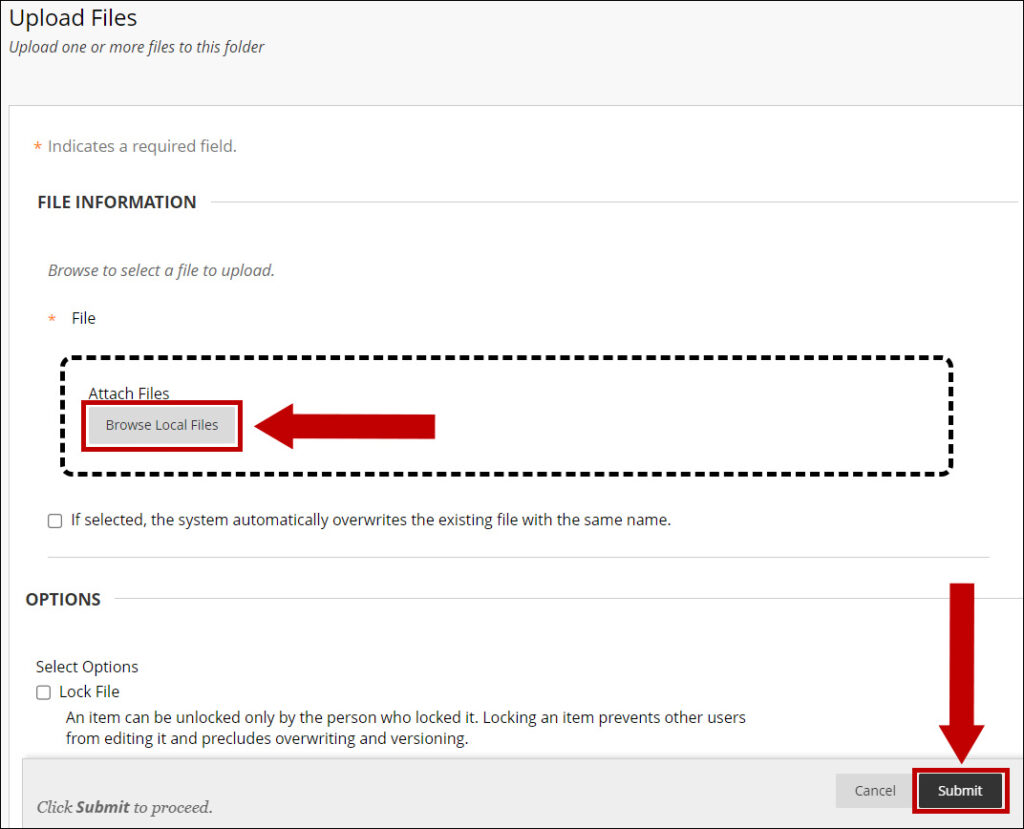
2. Select Browse Local Files to choose the file you wish to upload. Choose any applicable options. Click Submit after the file is attached.
Note: You can also upload a zip package of files from another course.
Delete Course Files
Deleting a file from the Content Collection permanently deletes the item from your course and reduces your course storage size. If you delete a file from a course content area it is not deleted from the course storage; you must also delete it from the Content Collection to reduce the course storage size.
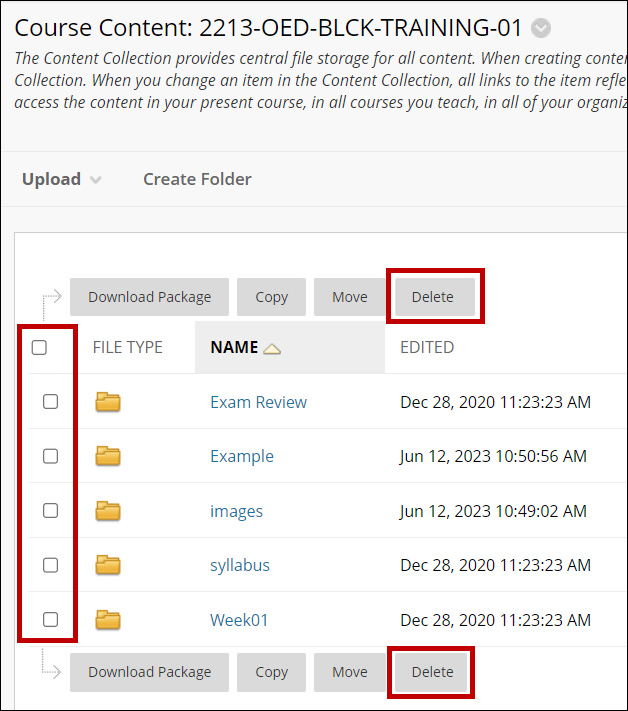
1. Locate the file(s) you wish to delete and check the checkbox to the left of the file name. Click the Delete button at the top or bottom page.
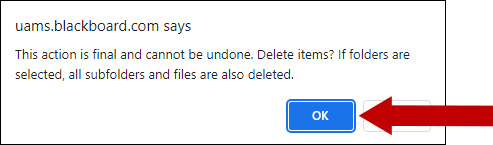
2. A confirmation notice displays; click OK.
3. If the file you selected to delete is not used anywhere in the course, it will be deleted.
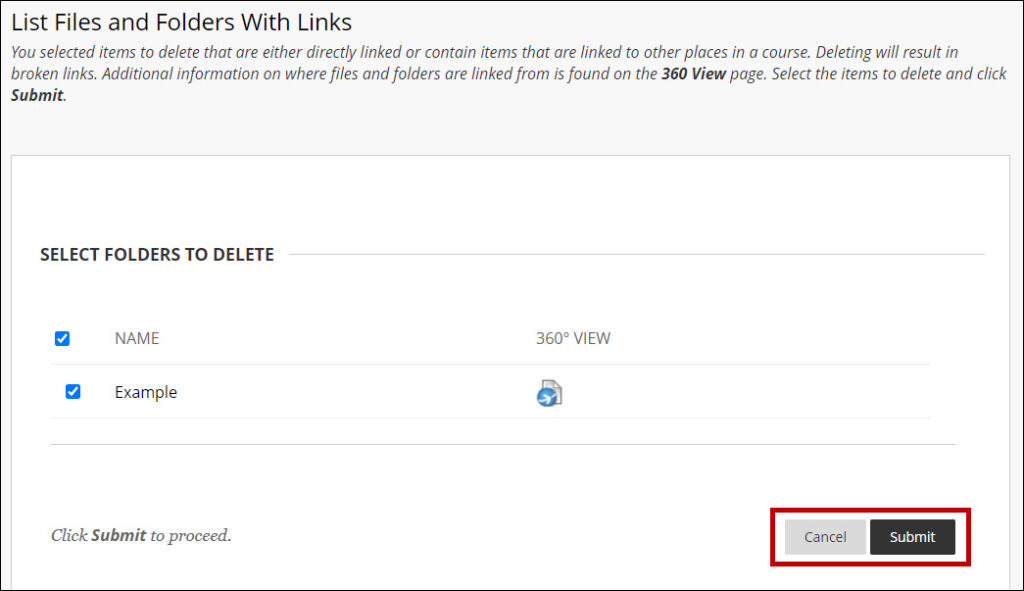
If the file you selected to delete is used in the course, you will receive a notice. Select Submit to continue with the Delete process or Cancel.
Please let us know if you have any questions or concerns at BlackboardHelp@uams.edu.