Instructors who have the role of Org Leader can simultaneously enroll a group of students into an organization.
1. On the Organizations page, locate the organization in which you want to enroll students. Click the name to access it. If the organization is not available yet, check the main tab for upcoming organizations.

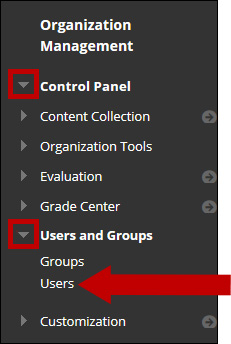
2. Once in the organization, under the Control Panel, click Users and Groups > Users.
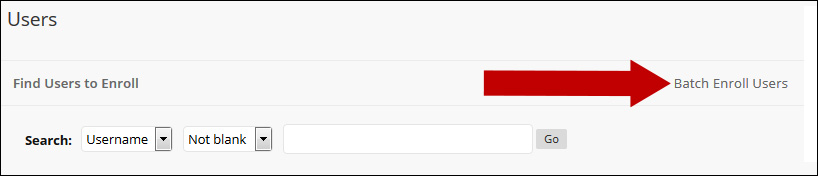
3. On the Users page, click the Batch Enroll Users button.
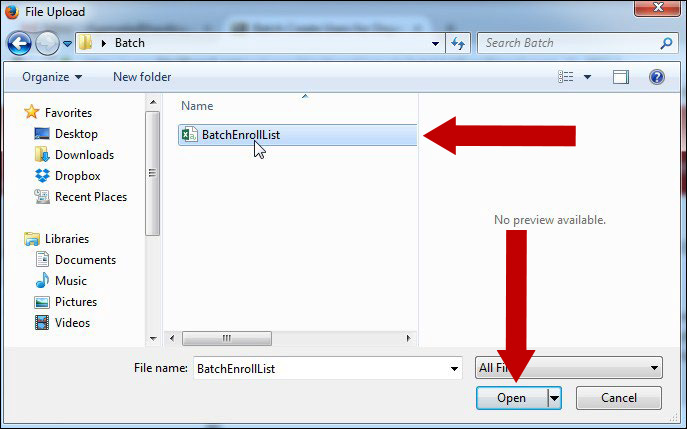
4. In the File Upload section on the Batch Enroll Users page, click the Browse button to locate the enrollment file with your users. Please see step 9 for file requirements.

5. Navigate to where you saved the batch file on your computer. Select the file and click the Open button.
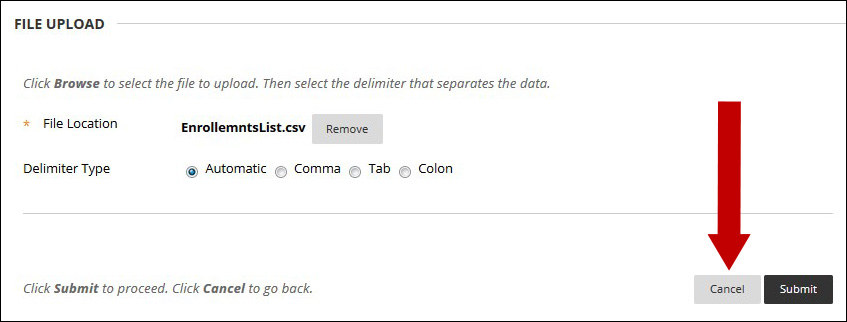
6. The File Location now displays the selected file. Leave the Delimiter Type as Automatic. Click the Submit button.
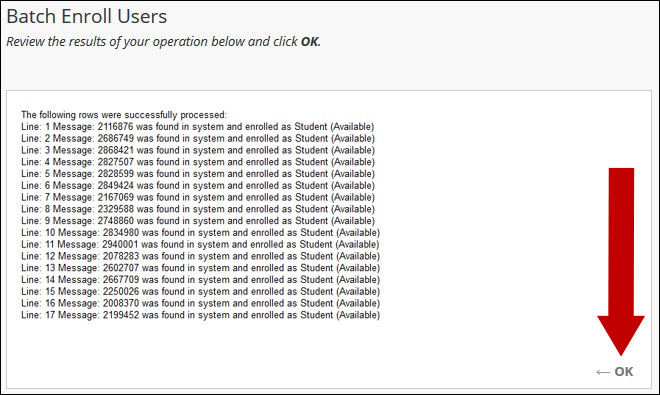
7. The batch enrollment process begins. When the enrollment is complete, a results page will display. Click the OK button.
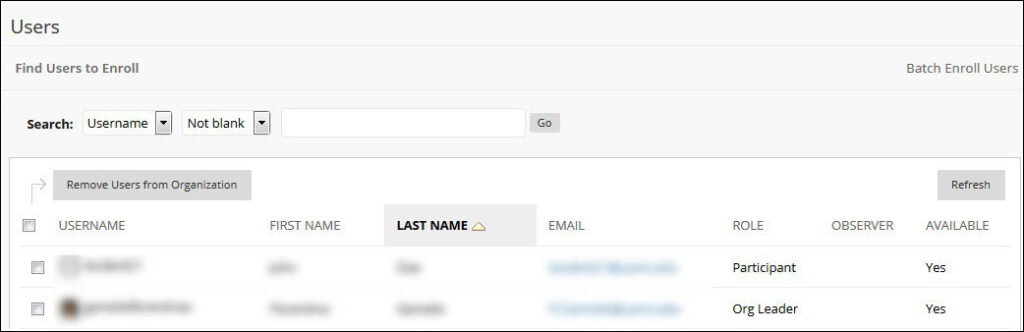
8. The Users page now displays the list of users enrolled in your course.
9. When creating the Batch file, Blackboard requires specific columns to be present in order for the file to be valid. For the Batch Enroll List file, please populate your columns in the order listed with this information:
- Username
- Last name
- First name
- UAMS email
- Empty column for the “Password” field.
- Role column with S for participant and OL for ORG Leader
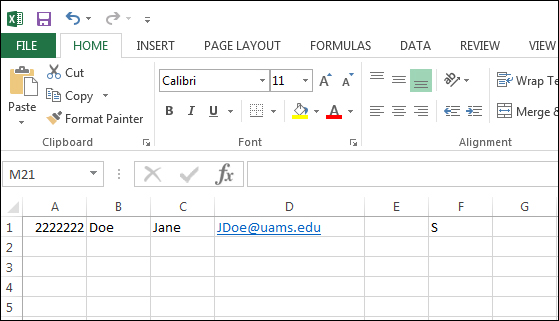
Above is an example of how your feed file will look using Microsoft Excel. The user has a username of “2222222”, last name of “Doe”, first name of “Jane”, email of “JDoe@uams.edu,” password of “empty field”, and organization role of “S”.
Each user you want to enroll will need to be on a separate row. For example, if you have 5 users you want to enroll, you will have 5 rows containing the required columns.
Save your enrollment file as a .csv file.