On the Course Content page, you can create folders to organize your content.
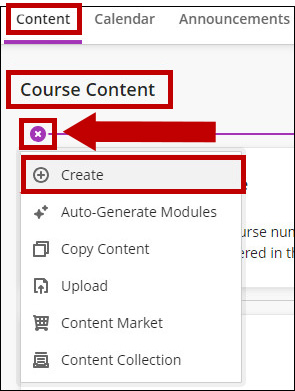
1. To add folders, select the plus sign on the Course Content page at the desired location.
2. Choose the Create button from the menu.

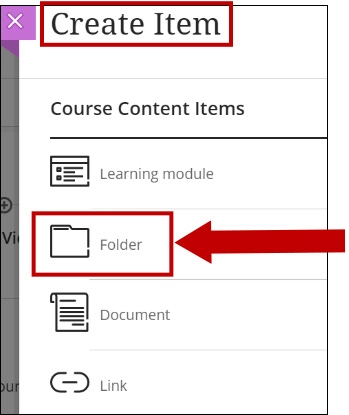
3. A new window opens to display the Create Item menu. Choose Folder from the Course Content Items list.

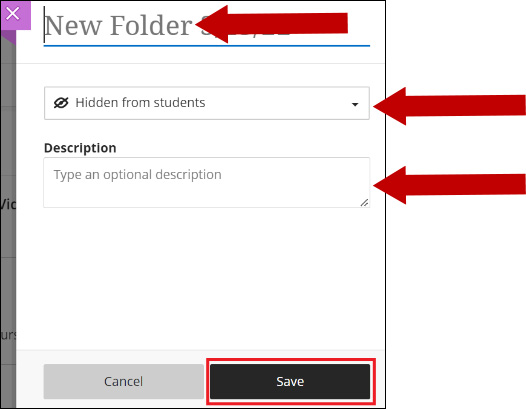
4. Type the folder name, select to keep it hidden or make it available, and type a description. Click Save at the bottom.

5. The new folder is displayed on the Course Content page.
You can use the ellipsis button for More Options (Edit or Delete).
Click the chevron button to open the folder to add content.

Note: You can create two levels of folders to organize your content. After you already have two levels of folders, you can’t create a third level or upload a folder into the second-level folder. You cannot add learning modules to a folder.
