Respondus 4.0 is a powerful tool for creating and managing exams that can be printed to paper or published directly to Blackboard and other eLearning systems. All UAMS faculty can download Respondus 4.0 from the Faculty Resources – Site License Downloads Blackboard course. If you cannot access this course, please contact BlackboardHelp@uams.edu for support.
See the Downloading and Licensing Respondus 4.0 step-by-step to start.
In order to publish or retrieve tests using Respondus 4.0 you need to connect it to Blackboard.
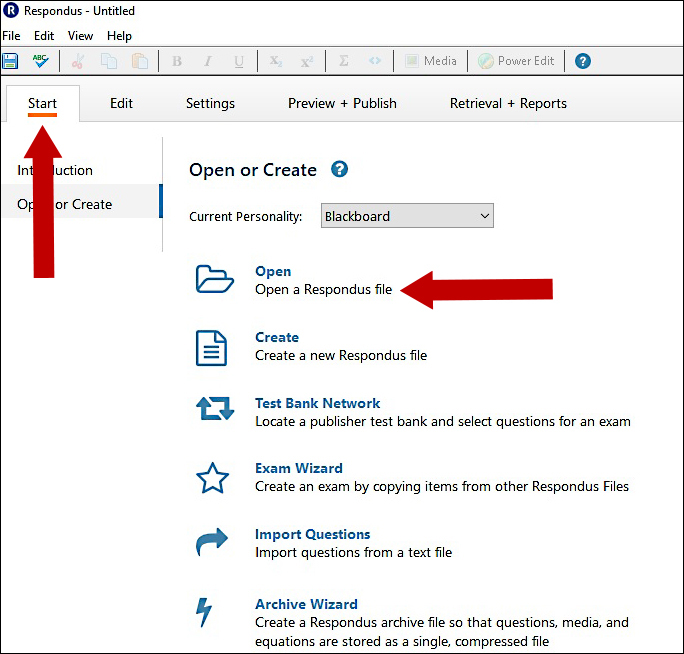
1. Open Respondus 4.0. On the Start menu, click Open.
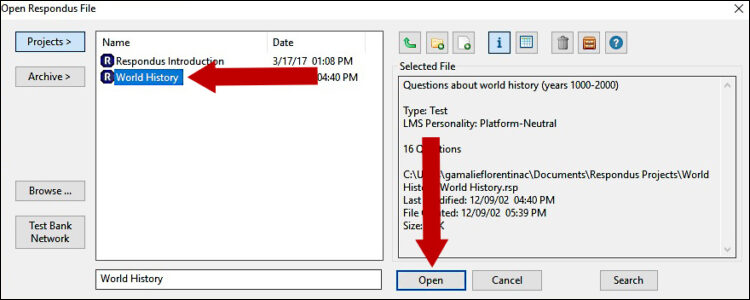
2. Select a file and click Open.
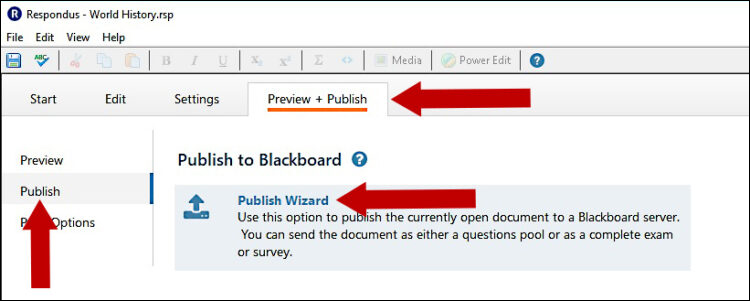
3. Go to the Preview + Publish tab. Click Publish and Publish Wizard.
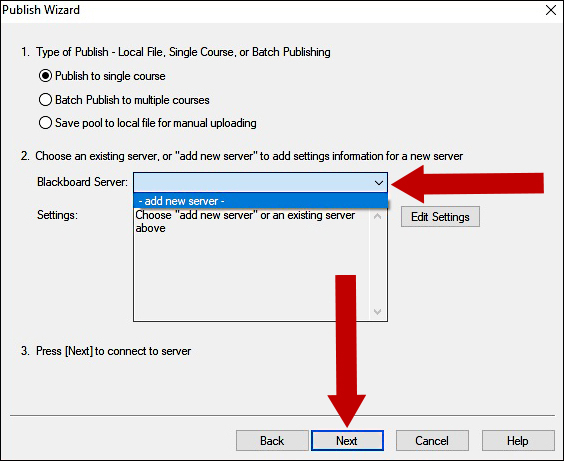
4. From the Blackboard Server menu select add new server and click Next.
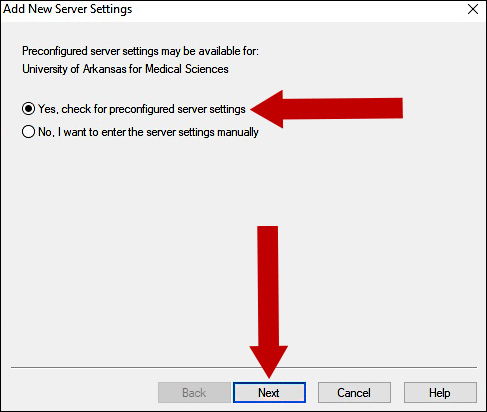
5. Choose Yes, check for preconfigured server settings. Click Next.
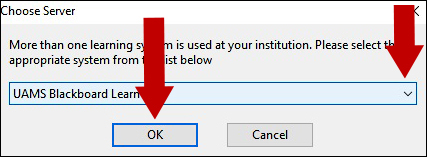
6. Choose UAMS Blackboard Learn 9.1 for the learning system. Click OK.
7. Name the server and save your username and password, if so desired. Keep the selection for the Run connection test and click Next.

8. Click OK on the next prompt.
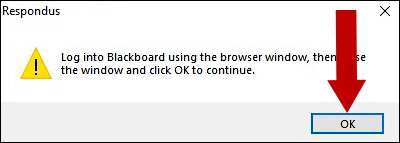
9. Click OK to start the Helper Tool Download. The installation will begin.


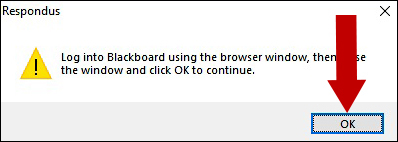
10. After the Helper Tool Download installs, you will be prompted to login to Blackboard.
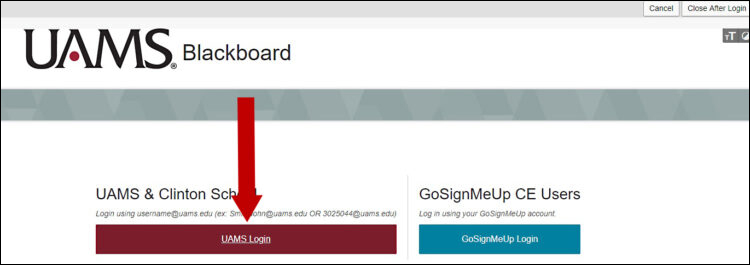
11. After you logged in close the window by using Close After Login.

12. Click OK.
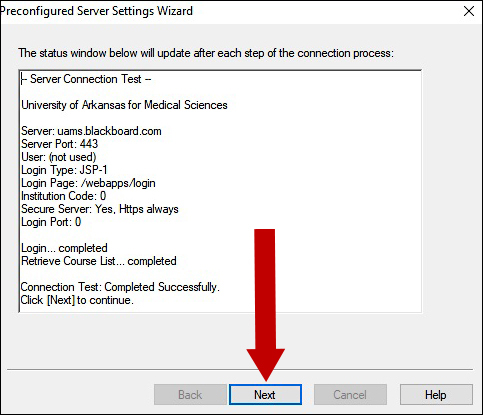
13. Click Next.
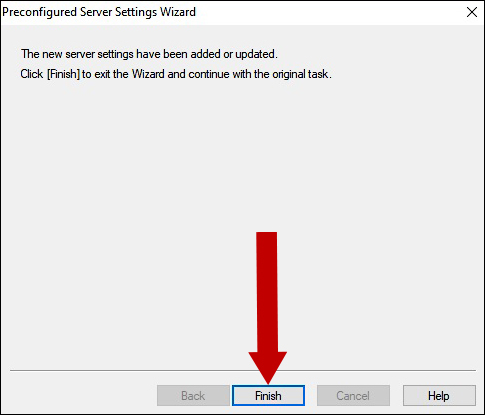
14. Click Finish.
15. The new server is added. Click Next to connect to Blackboard.
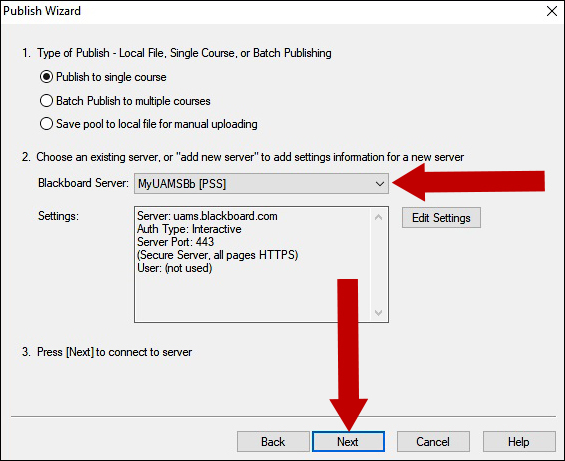
16. Click OK. Repeat steps 10 and 11 to login to Blackboard and Close After Login, and click OK.
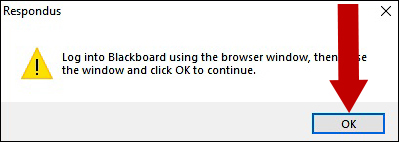
Note: Wait for the process to finish and display Step 17.
17. You are now connected to Blackboard.
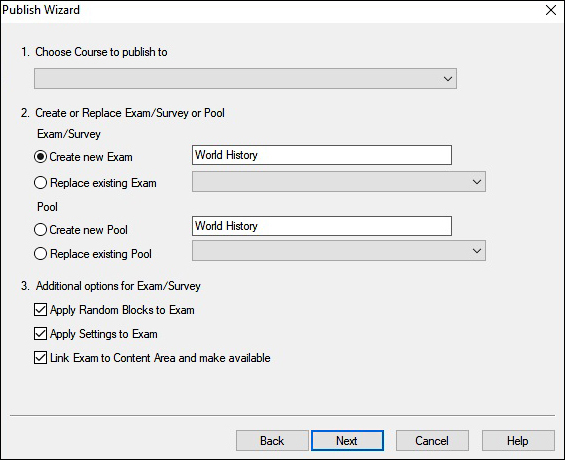
Note: You will setup the connection between Respondus 4.0 and Blackboard only once. You will be prompted to login to Blackboard (steps 10, 11, and 12) for any Blackboard access through Respondus. Follow up with more information in our Respondus 4.0 section.
