On the Course Content page, you can upload files. If allowed by the browser, some files open in a new window or tab.
Supported file types include DOC, DOCX, HTM, HTML, MP4, MPG, PDF, PPT, PPTX, XLS, XLSX, RTF, TXT, ZIP, and most image types.
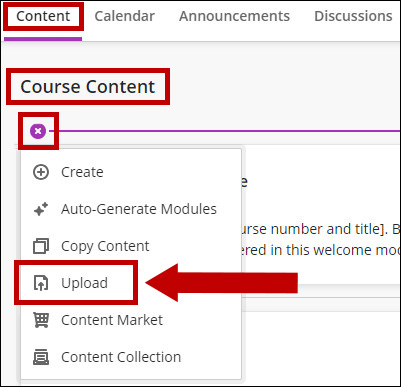
1. To add files, select the plus sign on the Course Content page at the desired location. Choose the Upload button from the menu.

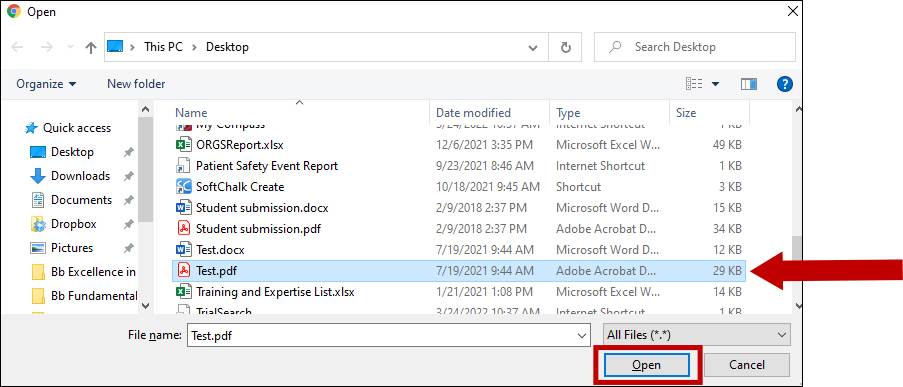
2. Select the desired file(s) and click Open.

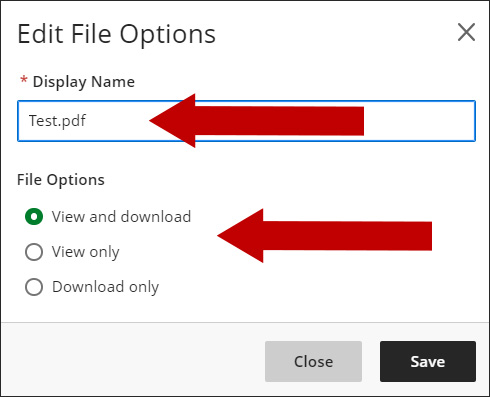
3. You can change the file Display Name and select the desired File Options.

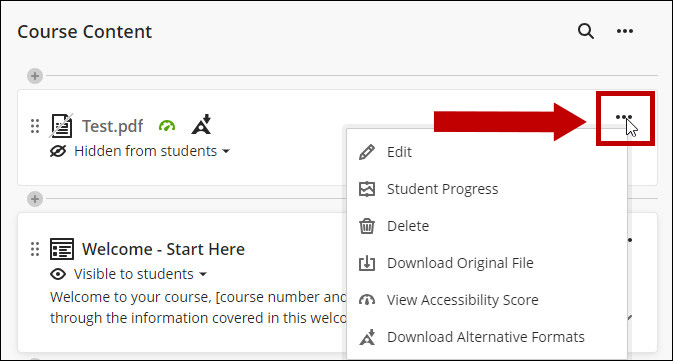
4. The file is displayed on the Course Content page. By default, the file is Hidden from students. To preview the file, click on its name.
Note: In most browsers, you can select where the files that you open in courses are downloaded. For example, in Chrome, navigate to Settings > Advanced > Downloads. You can select the location for file downloads and choose if you want the browser to ask each time. In Safari, you have the same capabilities. Navigate to Preferences > General > File download location. You can perform an internet search to learn about file download choices in other browsers.
The ellipsis button provides More Options.

Note: Files can also be uploaded by using other methods; see how to upload files with the Text Editor in our documentation.
