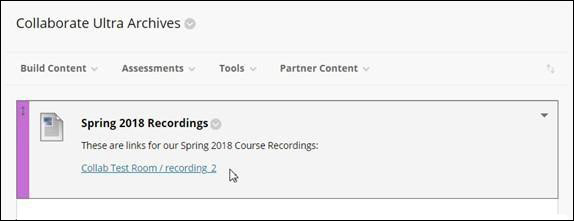
When you do a course copy, your Collaborate Ultra Dashboard recordings will not transfer. Please follow the below steps to put links to older recordings into your newer course. You will only have to do this once for each recording, as the links you create will copy to subsequent courses.
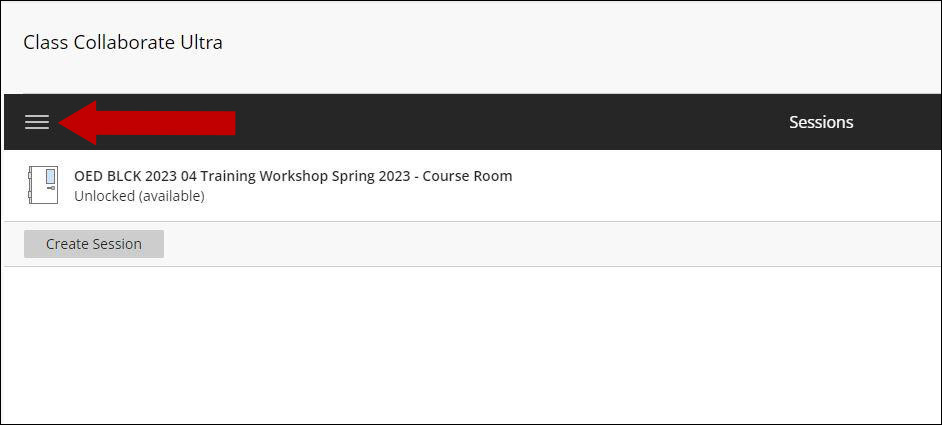
1. In your old course, access the Collaborate Ultra Dashboard and click the Menu icon to access the Recordings area.
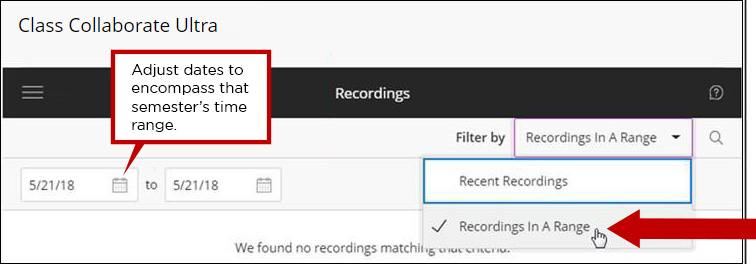
2. Click the dropdown menu next to Filter by. Set to Recordings in A Range. Adjust the dates as necessary.
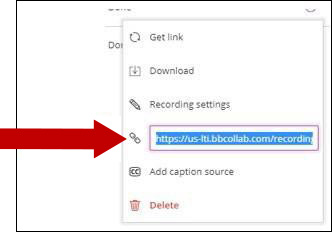
3. Click the ( ![]() ) to the right of the recording you want to copy. Click Copy link.
) to the right of the recording you want to copy. Click Copy link.

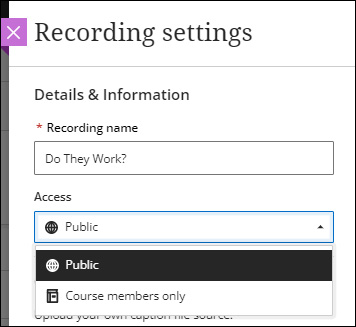
Note: For students to view recordings in the new course, access for viewing must be Public. Enabling public access will permit students in your new course to view the recordings from the previous course. To enable, click Session Options, and select Recording Settings. Under Access, select Public.
4. You will see a link that is highlighted in blue. Click Ctrl + C on your keyboard to copy the link to the clipboard.
5. Navigate to your new course shell. Although you can copy the links anywhere in your course, we recommend creating a new Content Area to house your archived Collaborate Ultra Recordings.
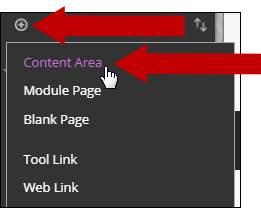
6. To add a content area, click the Add New Content icon and then click Content Area.
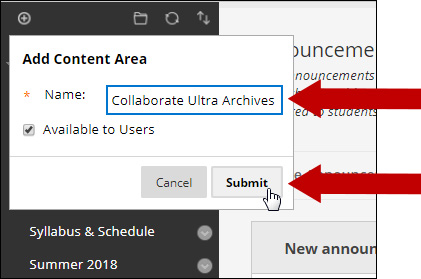
7. Type “Collaborate Ultra Archives” into the Name text field area, check Available to Users, and click Submit.
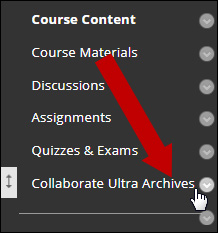
8. Click Collaborate Ultra Archives on the left-hand navigation area of the course to access the Content Area.
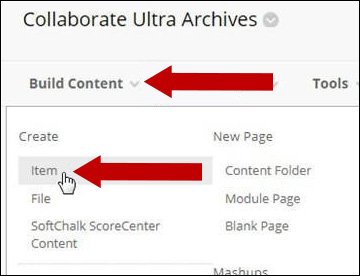
9. Once inside the Content Area, hover over Build Content to expand the menu and click Item under Create.
10. Set your Item Name to the course/semester from which the recordings originate. In the text box, type the name of the recording you are about to link.
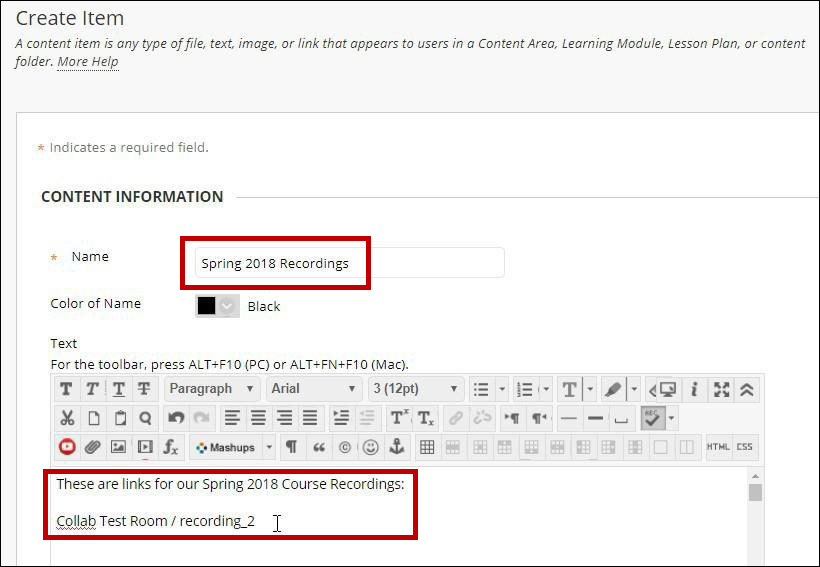
Note: You can also CTRL+V to paste the link right into the text box. You will still need to follow the next steps to activate the link.
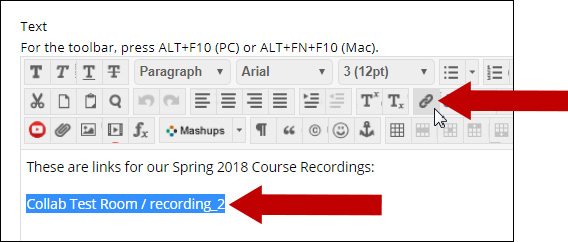
11. Highlight the text and click the Insert/Edit Link button.
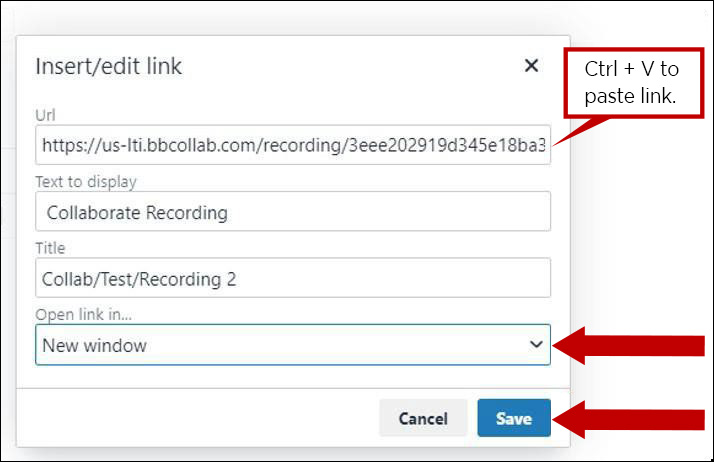
12. Paste the copied recording link into Link Path. Then, under the Target dropdown menu, select New Window and click Save.
13. Repeat steps 3 and 4 and 10 through 12 until you have linked all the recordings you wish to link.
14. Once you are done, click Submit.
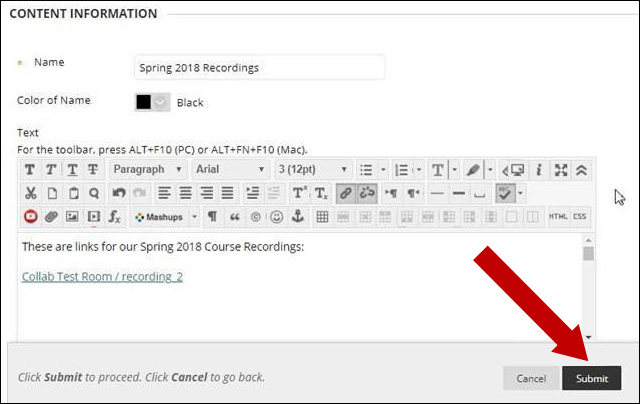
15. Your students can now access recordings from a previous course. Each time you copy the course, these links will copy. All you need to do is add the most recent semester’s recording links.
