For most organizations, instructors will batch-enroll participants. Please see the related step-by-step instructions for Batch Enroll. For a small group of users, someone with the role of Org Leader can enroll one participant at a time.
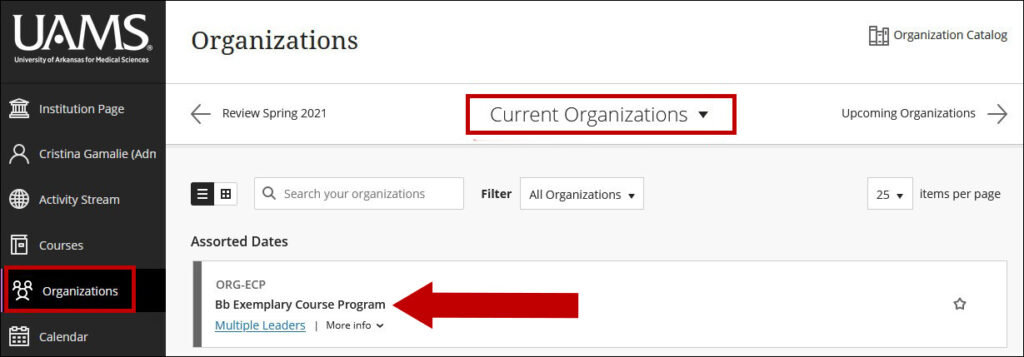
1. On the Organizations page, locate the organization where you want to enroll students. Click the name to access it. If the organization is not available yet, check the main tab for upcoming organizations.
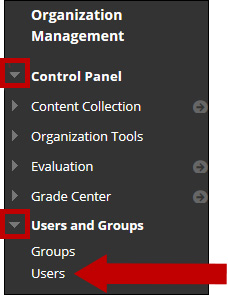
2. Once in the organization, under the Control Panel, click Users and Groups > Users.
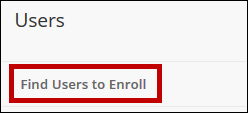
3. On the Users page, click Find Users to Enroll.
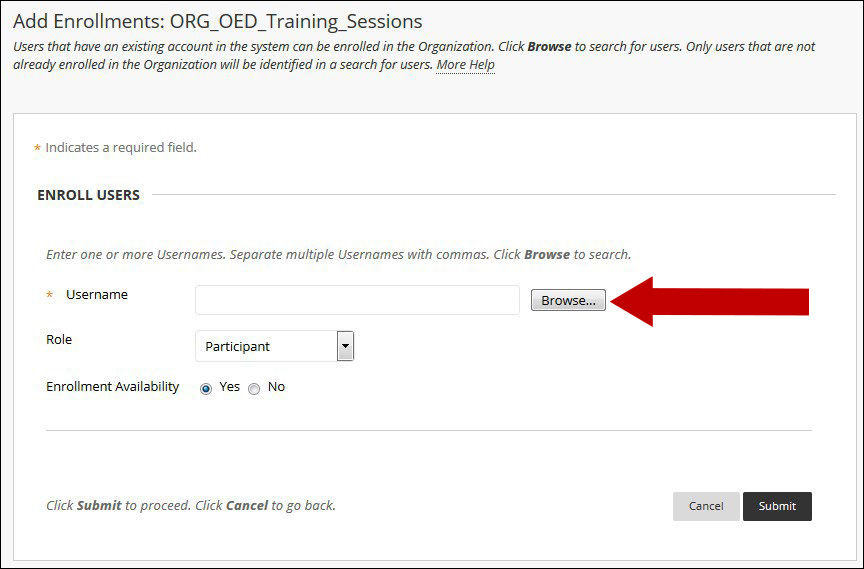
4. Type a username on the Add Enrollments page or click Browse to search for users.
Note: Only users not already enrolled in your organization will be identified in a search for users.
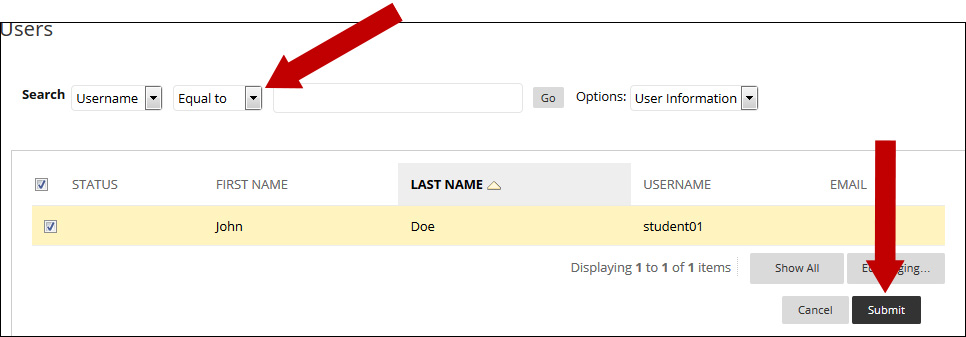
5. The Browse page lets you search by Username, First Name, Last Name or Email. When the correct person is located, click the checkbox to the left of their name and click the Submit button.
Note: If you want to add multiple users, each must be separated with a comma. Redo the search to select additional users to enroll.
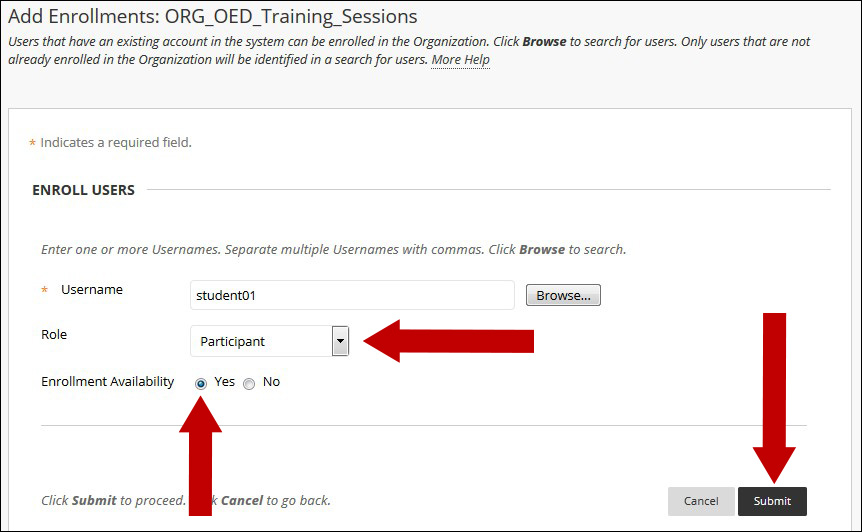
6. On the Add Enrollments page, the Username field is now populated. Make sure the Participant is selected as the Role and Enrollment Availability is set to Yes. Click Submit.
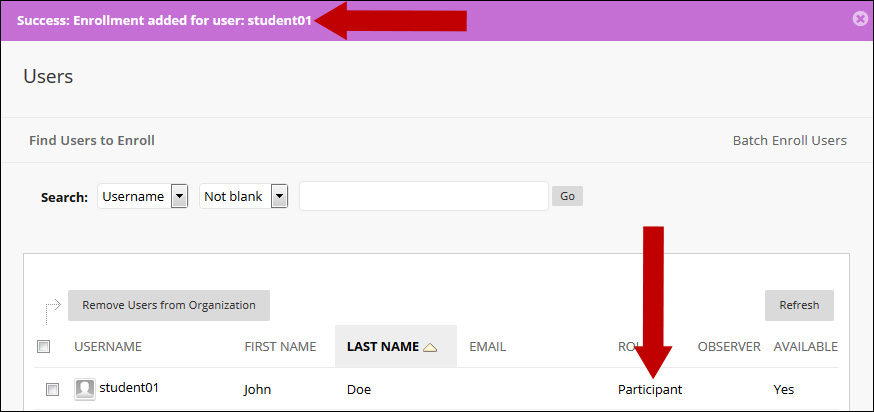
7. On the Users page, you should see a message at the top that says Success: Enrollment added for the user. The participant should now appear in the list with the respective role.